|
Getting Started
|
The idea here is to get you started in your plane spotting hobby in the most basic and cost effective way possible.
As you get more proficient at your new hobby, you can upgrade your skills along with your gear. Soon you'll be like a pro.
We aim to help you take quality photographs and to make you aware of basic safety, security and airport related information.
|
 |
|
Follow the various "PLANE SPOTTING" sections for more information.
|
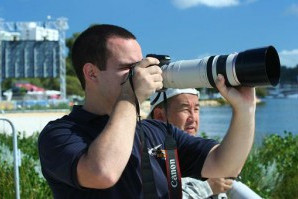
Professional 5DME Aviation Photographer,
David Wilkie. |

Let's Go!
Most people now ask about cameras but the first question should be, is this for me?
Things to consider are:
- there is a lot of walking involved
- the amount of patience required
- cost of equipment can be expensive
NOTE: Unless you follow the airline schedules or have prior knowledge of a particular aircraft's arrival, then patience is paramount and you may have to walk long distances. Airports a BIG places.
Your basic plane spotter requirements
- spotting or vantage point(s)
- digital or film camera with single lens
- sense of safety, especially near roads
- know security obligations
- vehicle for transport
- healthy legs for walking
This is only a basic list and you will make up the rest as you go along. For instance you may need wet weather gear, ancillary camera equipment or an assistant.
Spotting Points
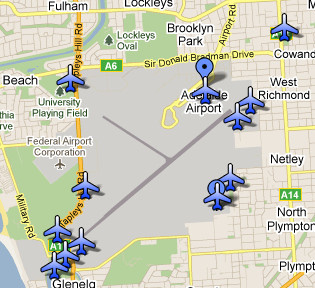 When choosing a spotting point, take into account the position of the sun, safety and security. You also may not be allowed in some areas at various airports. It is best to use public areas and some airports have plane spotting areas already set up specifically for aircraft observation. When choosing a spotting point, take into account the position of the sun, safety and security. You also may not be allowed in some areas at various airports. It is best to use public areas and some airports have plane spotting areas already set up specifically for aircraft observation.
Adelaide Airport has vantage points outside the airport grounds, especially along Tapleys Hill Road at the Glenelg (South Western) end. It is a good place to get started. Car parking is available and some good shots can be taken from these areas. Even the professionals use them.
Adelaide Plane Spotting map courtesy www.planespottingadelaide.com
Cameras
If you don't own a camera already, the urge to buy and use a top of the line, multi-lens camera should be avoided at this point. Trying to get the shots you most likely will be going after with the aircraft in motion might be difficult. A single zoom lens camera to cover the range you need is desirable. You may need to seek the help of your photographic supplier for this advice.
 |
 |
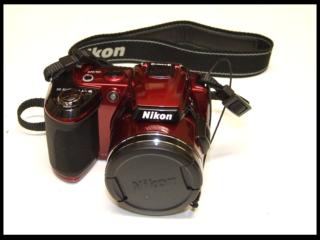
| The above camera style is perfect for beginners. |
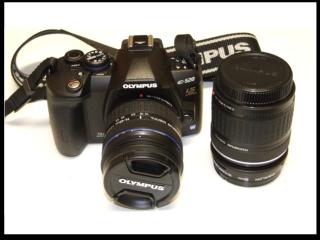
Multi-lens cameras are not recommended. |
| NOTE: These images are for illustration only. We do not recommend one brand over another. |
When choosing a camera type, the choice is up to you but in our experience a single lens camera is more than enough for the beginner. You may need to seek the help of your photographic supplier for advice. Tell them what you plan to be using the camera for and what your current skill level allows. This will help them to advise you.
Multi-lens cameras should be left alone until you gain more experience. As you go on, you will learn to choose your shots and inevitably will know what lens is required to take the best picture.
Why should I avoid multi lens cameras?
The shots most novices tend to go for are the in-flight shots at the end of runways etc. They look impressive and have the most impact. Why the single lens? Well, you can't swap lenses while a plane is whizzing by at 80 knots or more. The 75-300mm zoom lens might be good on the approach but when the aircraft roars past you, I'll bet you will wished you had the wider angle 35-75mm lens. Then you'll want to swap back to the 75-300mm lens as the plane
disappears down the runway.
So, a good digital camera with one good range zoom lens that covers most requirements will be your best bet initially. Optical zoom is better than digital. Cost is the factor here.
Taking the Photos
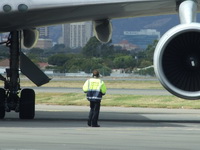 Unless you are an accomplished photographer, taking pictures into the sun can turn out disastorous for the novice plane spotter. Aircraft always look better when photos are taken with the sun behind you. Colours are vivid and detail is at it's maximum. Unless you are an accomplished photographer, taking pictures into the sun can turn out disastorous for the novice plane spotter. Aircraft always look better when photos are taken with the sun behind you. Colours are vivid and detail is at it's maximum.
Overcast days are a thing to avoid for the novice. There are no reflections from surfaces and colours are dull. You will soon get to know what works after you experience photographing aircraft in different lighting conditions.
Photo: Lighting can make or break a good shot.
On the other hand, rainy days can make for some great photography. The light and reflections can be used to create a great photo but the more experienced photographer will be better at these type photographs.
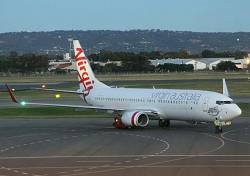 Another great time is dawn and dusk. The lower light levels can make very interesting shots for your library. Things you do not notice during the daylight hours soon become apparent. For example, aircraft illumination. Many airlines illuminate their livery and combined with navigation lights etc. It can make interesting photos. Another great time is dawn and dusk. The lower light levels can make very interesting shots for your library. Things you do not notice during the daylight hours soon become apparent. For example, aircraft illumination. Many airlines illuminate their livery and combined with navigation lights etc. It can make interesting photos.
Photo: Dusk Photography.
You can be too close. Most good shots are taken from a distance so as not to use a lens that is too wide. Wide lenses have the effect of distorting the image into a barrell/fish-eye look. The wider the lens the more fish-eye the image becomes. Unless you deliberately want this effect, stay back further and use a medium lens to minimise distortion.
A Word on Safety
Overall safety is paramount. Bad weather conditions, poor visibility and dangerous areas are your worst enemy. Slippery ground and rain is not only bad for you but your camera equipment.
Roads are also very dangerous for photographers. Looking through the viewfinder trying to get that one-in-a-million shot and just stepping back too far can be fatal. On roadsides it is advisable to have a second person looking out for your safety.
Don't go into dangerous locations. No shot in the world is worth personal injury.
Abide by instructions from officials. In the end, they have the final say.
Enjoy your new hobby and keep safe!
Article by: David Hales, Team Leader 5DME.
Photos by: David Wilkie & David Hales.
|

